R-LINK EVOLUTION FAQ’S
Need more information about your R-LINK Evolution multimedia system?
Bluetooth®, Android Auto™ & Apple Carplay™, Coyote and connected services, MY Renault application, updates & navigation, etc. Check out our answers to your frequently asked questions.
BLUETOOTH® & ANDROID AUTO™
The procedure for pairing a mobile phone with R-LINK may be carried out either from the phone, or from R-LINK. This procedure may vary depending on the phone used.
Note: Do not try the two procedures at the same time. This will makeBluetooth®connection impossible.
- For any type of Android device, the first essential step is to activate Bluetooth® on R-LINK: Homepage > Menu > Phone > Settings > Manage devices > “+” (bottom right of the screen) > Activate Bluetooth.
- The second essential step is to turn on Bluetooth® on your Android phone.
Method 1: For pairing from your Android phone
- Start by making the Bluetooth® network of your R-LINK visible: Homepage > Menu > Phone > Message “Manage devices”> NO > “+” (bottom right of the screen) > “Make R-LINK visible”: R-LINK is then visible for 300 seconds.
- Then search for Bluetooth® devices from your Android phone and choose the “Renault R-LINK” device.
- Approve the pairing procedure by checking the code displayed on the two devices and accept the connection request. Your Android phone is now paired with R-LINK.
Note: You may get a message asking you to enter the Bluetooth® code on Samsung devices. In this case, please enter the number displayed on R-LINK.
Method 2: For pairing from your R-LINK
- Automatically search for Bluetooth®devices from your R-LINK:
- Homepage > Menu > Phone > Message “Manage devices” > YES
- Choose your Android phone.
- Approve the pairing procedure by checking the code displayed on the two devices and accept the connection request.
Your Android phone is now paired with R-LINK.
The procedure for pairing a mobile phone with R-LINK may be carried out either from the phone, or from R-LINK. This procedure may vary depending on the phone used.
Note: Do not try the two procedures at the same time. This will make Bluetooth connection impossible.
For any type of device, the first essential step is to activate Bluetooth on R-LINK:
- Homepage > Menu > Phone > Settings > Manage devices > “+” (bottom right of the screen) > Activate Bluetooth.
- The second essential step is to turn on Bluetooth on your iPhone.
Method 1: for pairing from your iPhone
- Start by making the Bluetooth network of your R-LINK visible:
Homepage > Menu > Phone > Message “Manage devices”> NO > “+” (bottom right of the screen) > “Make R-LINK visible”: R-LINK is then visible for 300 seconds.
- Then search for Bluetooth devices from your iPhone and choose the “Renault R-LINK” device.
- Approve the pairing procedure by checking the code displayed on the two devices and accept the connection request. Your iPhone is now paired with R-LINK.
Method 2: for pairing from R-LINK
- Automatically search for Bluetooth devices from R-LINK: Homepage > Menu > Phone > Message “Manage devices” > YES
- Choose your iPhone from the list.
- Approve the pairing procedure by checking the code displayed on the two devices and accept the connection request.
Your iPhone is now paired with R-LINK.
Step 1: Make sure that your phone is compatible with your R-LINK Evolution. To do this, go to the Phone section from the Menu, click on Settings, then on Manage devices. Check that your phone appears in the list of associated devices.
Note: If you have trouble pairing your phone, see our FAQ “I cannot pair my phone with my R-LINK Evolution” in the same help section.
Step 2: To start a call, go to the phone menu and tap phonebook. Your contacts are automatically imported to your R-LINK Evolution screen. Select the contact you want to call and tap the number to start the call.
Note: If your contact list is empty on your R-LINK Evolution screen despite having correctly completed the pairing process, check on your phone that your contacts are stored in your phone memory and not on the SIM card. Contacts must be stored in your phone rather than on the SIM card to appear on your R-LINK Evolution screen.
Step 1: Make sure that your phone is compatible with your R-LINK Evolution. To do this, go to the Phone section from the menu, click on Settings, then on Manage devices. Check that your phone appears in the list of associated devices.
Note: If you have trouble pairing your phone, see our FAQ “I cannot pair my phone with my R-LINK Evolution” in the same help section
Step 2: Once your phone is paired with your R-LINK Evolution system, go to the multimedia menu and click on Media. Choose the “Bluetooth” audio source and select music on your phone.
Step 1: Make sure that your phone is correctly paired with your R-LINK Evolution. To do this, go to the Phone section in the main menu, click on Settings, then on Manage devices. Check that your phone appears in the list of associated devices.
Note: If you have trouble pairing your phone, see our FAQ “I cannot pair my phone with my R-LINK Evolution” in the same help section
Step 2: If your phone is correctly paired, but you still cannot make outbound calls, check on your phone that your contacts are stored directly in your phone and not on your SIM card.
Contacts must be stored in your phone rather than on the SIM card to appear on your R-LINK Evolution screen.
Note: If making calls still isn’t working after this, there may be a specific compatibility issue and we suggest that you call our Customer Support. To help better solve the problem encountered, please indicate that you have already followed the above steps.
Step 1:If you have trouble pairing your phone with R-LINK Evolution, please follow our pairing procedures (for iPhone, Android and Windows Phone) that you will find in the same help section.
Step 2: If the pairing process is still not working, please test compatibility with our online compatibility check here
To launch a test, you will need to know:
- Your phone model and your OS version
- Your R-LINK Evolution system version.
Specific sections on the compatibility test page explain how to find this information.
Step 3: You do not find positive results on our online compatibility test or you cannot find your versions on the list:
- Try to update the OS version on your phone if an update is available.
- Check if you have an R-LINK Evolution system update available on R-LINK Store.
Updating your systems may correct the problem and allow you to pair your phone. If not, please call our Customer Support and indicate that you have already followed the steps above to help solve the problem.
If the result of the online compatibility test is positive, this means that the pairing process should work and there may be a more specific problem. Please call our Customer Support and indicate that you have already followed the steps above so that we can help you as best we can.
Enable Android Auto™ voice recognition: Talk to Google™.
Method 1:Press and hold down the “Push To Talk” button until you hear an audible beep.
Method 2:Tap the “microphone” icon located in the top right-hand corner of your Android Auto™ screen. This will lead to an audible beep.
Method 3: Say the words “Ok Google”, Android Auto™ then makes an audible beep.
You can then ask several questions and control certain applications vocally, such as making a call, playing music, sending and replying to text messages, using maps and obtaining routes, creating reminders, etc.
Example: “Call ‘contact name’“, “Send a message to ‘contact name'”, “Create a route for ‘address'”, etc.
Worth noting: Phone calls work through the car’s audio system using R-LINK Evolution. However, voice recognition cannot go through the audio system when connecting to Android Auto™. The smartphone may be the source of the problem. If this is the case, please contact user support for the manufacturer of your smartphone.
1. On your phone:
- Download the “Android Auto™” application on the Google Play Store.
- Start the application and follow the on-screen instructions by accepting the general terms and conditions.
2. In the car:
When your vehicle is stopped, unlock your smartphone’s screen and connect it to your Renault vehicle’s R-LINK Evolution multimedia system using a compatible USB cable. A message appears on the screen asking if you would like to start Android Auto™. Click on yes, then click on the Android Auto™ button located in the bottom middle of your screen to go to the homepage. Another screen is displayed inviting you to check your smartphone.
3. On your phone: Follow the steps indicated on your phone’s screen. For an optimum experience, we recommend that you accept all the authorisations and requests.
4. In the car
From the R-LINK Evolution screen, click on the button located in the bottom middle of your “Android Auto™” screen and go to the Android Auto™ homepage.
Note: We recommend that you use a USB cable of the same brand as the smartphone in order to avoid any problems.
The phone cannot be used during connection.
To check that your Renault is compatible*:
- Go to the main menu of your R-LINK Evolution.
- Press “System”.
- If an “Android Auto™ Parameters” button is then visible, your Renault is compatible.
*Available on certain models. For more information on each Renault model equipped, go to the vehicle pages of our website: https://www.renault.fr/vehicules/vehicules-particuliers.html
To use Android Auto™, you must have a telephone equipped with Android version 5.0 (Lollipop) or above.
RENAULT tests a range of phones for you to ensure compatibility. This range includes some models equipped with Android 5.0 or above that are not supported by Android Auto™ for R-LINK Evolution.
In our user manual section further down on the help page, you will find the list of phones tested by Renault Engineering in PDF format.
In order to make sure your smartphone is compatible with the Android Auto™ system, you are advised to run all of the software updates available for it.
Install the following applications:
Android Auto™ comes with 4 native applications:
- Google Maps
- Phone
- Text messaging
- Play Music
On your smartphone, using Google Play Store, you can install additional applications that are compatible with Android Auto™ such as WhatsApp™ or Spotify™.
To see the list of compatible applications, go to this link: g.co/androidauto.
Note: Only applications certified by Google and downloaded to your smartphone can be used on Android Auto™ while driving.
Below you will find the list of controls compatible with Android Auto™:
- “Media” button: Select auxiliary audio sources, Bluetooth, from an SD card or Android Auto™.
- “TEL” button: Access the Android Auto™ phone menu.
- Volume buttons: Increase or decrease the volume of an audio source from Android Auto™.
- Pick up/hang up buttons: Take your calls with Android Auto™.
- “Push To Talk” button: Press and hold down to enable Android Auto™ voice recognition.
- “Menu” button: Access the R-LINK Evolution home page.
Returning to R-LINK Evolution from Android Auto™:
Method 1:
- On the Android Auto™ home screen, tap the icon in the bottom right-hand corner.
- Tap “Return to Renault”.
Method 2:
- Tap the home button of your R-LINK Evolution.
Combine Android Auto™ and R-LINK Evolution on the same screen:
You can then display the music player of your choice (Spotify, Google Music) on Android Auto™ and R-LINK Evolution’s navigation system. Or you can display Android Auto™’s navigation (Maps) while listening to the R-LINK Evolution system’s FM radio.
Note: Two similar functions cannot be enabled at the same time. You cannot enable both Maps in Android Auto™ and navigation in the R-LINK Evolution system.
CONNECTED SERVICES
Here are the steps to follow to unpair a device from your R-LINK:
- From R-LINK, go to Menu > Phone > Settings > List of devices
- Click on the “Phone” and “Media” icons
- The following message will appear: “Do you want to disconnect your device”, and click on “OK”.
If you would like to delete a device from the saved list from R-LINK:
- Go to Menu > Phone > Settings > List of devices.
- Click on the “Phone” icon
- Select the context menu
- Click on “Delete device”
- Tick the device and click on “Delete” at the bottom of the screen. The device has now been deleted from R-LINK.
Here are the steps to follow to download and install Coyote on your R-LINK:
- On the home page of your R-LINK, click on “Menu” – “System” and on the second page click on “Remove the SD card”.
- You can now safely remove the SD card of your R-LINK by gently pressing down on it.
- Insert your SD R-LINK card in your computer’s drive.
- The R-LINK Toolbox software should launch. If this is not the case, launch the software:
- Log in to the MY Renault account.
- Click the “R-LINK Store” icon.
- Click on “My applications and services”
- Click on “Manage my products”
- Click on the “Manage” button on the R-LINK line
- A window with the list of applications will open: check that Coyote Series is ticked
- Then click on the “Synchronise” button.
- Return to the R-LINK Toolbox software and click on “Launch my downloads”.
- Wait for the end of the download on the R-LINK SD card to be confirmed by the R-LINK Toolbox software.
- Remove the R-LINK SD card and insert it into the R-LINK system of your Renault, with the engine on.
- During installation of the application, the R-LINK system may be inactive and restart; do not however remove the SD card.
Here are the steps to follow to transfer the Coyote pack from one vehicle to another:
- Log in to your MY Renault account.
- Click on “Access all my services” then “Manage my applications” to connect to the R-LINK Store.
- Click on the arrow to the right of the “Welcome” menu to open a scroll-down menu. Select “Tools”.
- Choose the source vehicle with the pack you would like to transfer, then choose the target vehicle.Note: Both vehicles must be registered on your MY Renault account.
- Then click on “Display the transferable packs”.
- All the transferable products will then be displayed.
Note: Once the transfer request has been confirmed, the operation cannot be cancelled. It will not be possible to transfer a pack from the destination vehicle to the source vehicle.
- Click on “Confirm the transfer”.
- You will receive a transfer confirmation.
Packs that contain TomTom Live or TomTom Traffic are not transferable because they are linked with the vehicle subscription only.
If Coyote Series is not working any more, it may be that your 3-month trial version has expired.
You can check if your contract is still active in the R-LINK Store. (Please see our FAQ “How do I access the R-LINK Store?” if you need help.)
In the R-LINK Store, go to the “My Applications and Services” section to see the status of your connected services contracts.
If your free 3-month trial has expired, you can extend it by buying the full version available in the Catalogue section.
If you have an active contract but your Coyote is still not working, check in your car if data sharing is activated on your R-LINK Evolution system: Main menu / Services / Settings / Data sharing. Data sharing needs to be activated for Coyote to be operational.
If the problem persists, call our Customer Support for help and indicate that you have already followed this procedure.
To activate your Coyote Series 3-month trial version, the connectivity of your car must be activated.
To know if your car is active, check on your R-LINK Evolution system if the “Activate my services” button appears at the bottom of the screen in the main menu.
If the button appears, click on it and follow the instructions to activate connectivity. Once this process is complete, your Coyote Series 3-month trial version will be operational within 72 hours.
You will find the Coyote application in the services section.
If the “Activate my services” button is not displayed in the main menu, it means that your car’s connectivity is already active and that your Coyote Series 3-month trial version is operational.
To know if your car is connected, go to the Menu and check if the “Activate My Services” button appears at the bottom of the screen.
If the button does not appear on your screen, it means that your car is already connected.
If the button appears, click on Activate My Services and follow the instructions.
Note: Activating the connectivity of your car may take up to 72 hours.
Your car is now connected and you can enjoy all of your services. Please see the FAQ “Why activate connectivity?” for more information.
Note: Data sharing needs to be activated for your connected services to work.
To check if you have activated data sharing, go to Main menu / Services / Settings / Data sharing.
Activating the connectivity of your car will allow you to benefit from services such as:
- The Coyote Series application to get real-time information about accidents and road closures and drive with the help of more than 4 million Coyote users in Europe.
- TomTom Traffic to get real-time traffic information directly on your navigation via GPS, updated every two minutes and covering 99% of European roads.
- Map updates – keep your maps up to date. Roads change every year. Set off with peace of mind: your map updates are free for 3 years when you purchase a vehicle.
To check if your connectivity is active, please see our FAQ “Is my car connected?”
You can deactivate/activate data sharing whenever you want in the services section of your R-LINK Evolution:Main menu / Services / Settings / Data sharing.
Note: Connected services (Coyote, TomTom Traffic, etc.) need active data sharing to work properly.
MY RENAULT
To access the R-LINK Store and all of its content for the first time;
STEP 1: Start by creating your MY Renault account
- Go to https://myr.renault.ie/
- Then click on “Register”.
- Fill out the form with your personal details. Note: Your password protects access to your account. Keep it safe.
- Click on “Create my account”. An email will be sent to your inbox. Open it, then click on the activation link.
Note: If there is no activation email in your inbox, please check your spam folder.
STEP 2: Register your Renault vehicle in your MY Renault account
- In the home page of your MY Renault account, add your vehicle with its identification number and first registration date.
- Select your R-LINK equipped vehicle from the main menu of your MY Renault account.
- Then click on “Access my services”.
- The “My connected services” heading appears at the bottom of the page. Click on the R-LINK “Manage my applications” link to enter;
To access the R-LINK Store and all of its content for the first time:
STEP 1: Start by creating your MY Renault account
- Go to https://www.renault.fr/connexion-inscription-my-renault.html.
- Then click on “Register”.
- Fill out the form with your personal details. Note: Your password protects access to your account. Keep it safe.
- Click on “Create my account”. An email will be sent to your inbox. Open it, then click on the activation link.
Note: If there is no activation email in your inbox, please check your spam folder.
STEP 2: Register your Renault vehicle in your MY Renault account
- In the home page of your MY Renault account, add your vehicle with its identification number and first registration date.
- Select your R-LINK equipped vehicle from the main menu of your MY Renault account.
- Then click on “Access my services”.
- The “My connected services” heading appears at the bottom of the page. Click on the R-LINK “Manage my applications” link to enter the R-LINK Store.
- In the R-LINK Store, you will find the updates and the catalogue of content available for your R-LINK.
In order to manage R-LINK system content using available memory:
- On the home page of your R-LINK, click on “Menu” – “System” and on the second page click on “Remove the SD card”.
- You can now safely remove the SD card of your R-LINK by gently pressing down on it.
- Remove the R-LINK SD card from your vehicle by gently pressing down on it.
- Insert your R-LINK SD card into your computer and launch the R-LINK Toolbox software, which will inform the R-LINK Store of the current content of your R-LINK.
- Log in to your MY Renault account, go to “My Applications and Services” and click on “Manage my products”.
- The R-LINK line allows you to manage the applications installed on your system.
- The SD Card line allows you to manage the maps on your system.
- Click on the “Manage” button of the R-LINK line and choose the applications you would like to install or uninstall on your system.
- Some technical applications cannot be uninstalled because they are necessary for the correct operation of the system.
- Then click on the “Synchronise” button.
- Return to the R-LINK Toolbox software and click on “Launch my downloads”.
- Wait for the end of the download on the R-LINK SD card to be confirmed by the R-LINK Toolbox software.
To add free or paid-for content for your R-LINK (services, applications, maps):
- Go to your MY Renault account via the following link: https://www.renault.fr/connexion-inscription-my-renault.html
- Select your R-LINK equipped vehicle from the main menu of your MY Renault account.
- The “My connected services” heading appears at the bottom of the page. Click on the R-LINK “Manage my applications” link to enter the R-LINK Store.
- From your R-LINK Store account, enter the “Catalogue” menu to choose the content available for your R-LINK. Select content in order to see its characteristics then click on “Buy”.
- To purchase maps or applications, you must download them onto your SD card and then install them on your R-LINK.
- To purchase services (TomTom Traffic Connectivity and Coyote Series subscriptions, etc.), no downloading or installation is necessary, these services will be activated directly on your R-LINK within 72 hours of the purchase.
The R-LINK Store allows you to do several actions:
- Consult the catalogue of applications and services available for your car. You can buy or renew services from the Catalogue section
- Consult the current status of your service contracts to see which services are active for your car.
- Update your map and software versions to always drive with the last version available. You can do this in the Updates section.
- Lastly, you can go to the help section where you will find useful answers to the most frequently asked questions and find explanations on procedures.
Creating a MY Renault account allows you to benefit from all of the services for your car.
Registering for MY Renault will allow you to:
- Access the R-LINK Store to manage your applications (buy or renew your services) and update your map and software versions.
- Be notified of main maintenance milestones for your car
- Consult the current status of your contracts (warranty services, connected services, etc.)
To create an account in MY Renault, please click here.
UPDATES & NAVIGATION
Updating your R-LINK/R-LINK Evolution or Carminat TomTom system is important to guarantee the operation of the navigation and connected services after 6 April 2019.
The R-LINK 2 and TomTom Live systems do not need to be updated.
You can update your system on the Renault CONNECT site free of charge.
The R-LINK 2 and TomTom Live systems do not need to be updated.
Please follow the steps below:
1/ Select the R-LINK Evolution system;
2/ Enter your car’s 17-digit VIN (Vehicle Identification Number)(e.g. VF1RFA123ABC12345).
Note: This number can be found on the registration certificate or in the bottom left-hand corner of your car’s windscreen.
3/ Download the update file to your computer;
Note: Make sure that your Internet connection is active throughout the entire procedure.
4/ Unzip and copy the update file onto an empty USB stick (Stick size: 8-32 GB; formatted in FAT32).
5/ Start the engine and check that your R-LINK/R-LINK Evolution system is on
IMPORTANT: Do not switch off your R-LINK/R-LINK Evolution system. Leave your car parked, with the engine running, throughout the entire duration of the installation process.
6/ Insert the stick into the USB port of your car and follow the instructions on the screen.
Note: The update may take approximately 15/20 minutes
At the end of the installation process, the message “Updating CanCoProcessor” may appear on the screen of your R-LINK/R-LINK Evolution. In this case, you need to wait a few minutes until the system restarts completely.
Yes, you can update your R-LINK/R-LINK Evolution system on the Renault CONNECT site free of charge. Click HERE to start the update.
Note: For more information, you can consult our FAQ “How do I update my R-LINK/R-LINK Evolution?”.
Packs that contain TomTom Live or TomTom Traffic are not transferable because they are linked with the vehicle subscription only.
If your TomTom Live Traffic is not working properly, it may be that your 3-year trial contract has expired.
You can check if your contract is still active in the R-LINK Store (please see our FAQ “How do I access the R-LINK Store?” if you need help).
In the R-LINK Store, go to the “My Applications and Services” section to see the status of your connected services contracts.
If your TomTom Live Traffic contract has expired, you can buy the full version available in the Catalogue section.
If your contract is active, but TomTom Live Traffic is still not working, check that data sharing is activated on your R-LINK Evolution system: Main menu / Services / Settings / Data sharing. Data sharing needs to be activated for TomTom Traffic to work.
If the problem persists, please try to update your software and map versions from the R-LINK Store in the Updates section. (Please see our FAQ “How do I update my maps?” if you need help.)
If, in spite of this, the problem has still not been solved, please call Customer Support for help and indicate that you have already followed this procedure.
To follow the process, you will need the SD card of your R-LINK Evolution system and a computer with Internet access.
Step 1: Removing your SD card – In your car
First, go to your car, switch on the engine and your R-LINK Evolution system. In the main menu, click on the “+” icon, press the “Remove SD card” button and confirm. You can now safely remove your SD card from your vehicle. (Note: The SD card is located next to the USB port in your vehicle.)
Step 2: Downloading a new map – On your computer
Switch on your computer, go online and log in to the R-LINK Store (please see the FAQ “How do I access the R-LINK Store?” if you need to).
Once in the R-LINK Store, a pop-up window appears if updates are available (Note: if no pop-up window appears, your map may already be up to date. You can still check if a new map is available in the “Updates” section). Select the item that you want to update and click on Access Updates and then on Update.
Insert your SD card into your computer, launch the R-LINK Evolution toolbox application and start downloading the updates. (Note: Depending on the size of the maps and your Internet connection, the download may take some time.)
Once the download is finished, you can safely remove your SD card.
Note: If you receive an error message saying there is insufficient storage, re-insert the SD card in the vehicle and delete any unused applications to increase the available memory space (e.g., e-Guide App).
To do this, go to the “Service” menu, select “Settings”, then “Application Manager”. Select the application(s) you want to delete. Next, under the first tab, press “+” and then “Delete Application”. Afterwards, repeat the process from step 1.
Step 3:Installing the new map in your R-LINK Evolution – In your car
Take the SD card containing the new downloaded maps back to your vehicle. Start the engine and leave it running during the operation. Then insert the SD card and switch on your R-LINK Evolution system. The installation process will start automatically.
Note: Do not use your R-LINK Evolution system and leave your engine switched on during the installation operation.
A message will tell you when the installation is complete. You can benefit from the new maps straight away.
To launch GPS Navigation from your R-LINK Evolution homepage, click on Menu and then press Navigation. In the Navigation menu, press the “Drive to” button to enter your destination.
You will need to enter:
- Country
- Town and postcode
- Street
- Number
Confirm the destination and the navigation will start after a few seconds.
Note: You can find all your previous destinations and nearby points of interests (Petrol Stations, Car parks, etc.) in the Destination Menu.
Videos to help you
Getting started with R-LINK
How do I use the radio with R-LINK?
How do I make and receive calls?
How do I update the SD card?
How to listen to music with R-LINK?
Consult our user guides
Need help?
Want to know more?
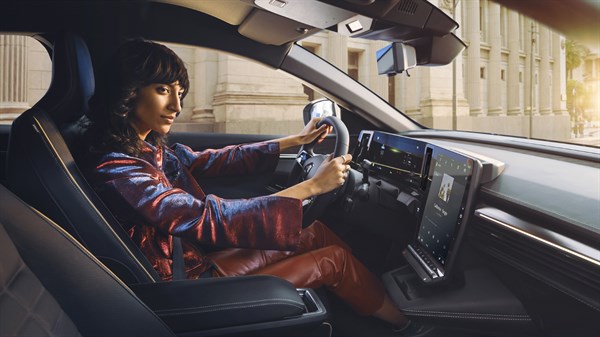
openR link

openR link


